Section 6: Access from Smartphone
If you have set up port forwarding and DDNS, you will now be able to install a mobile app and view your camera directly on your smart phone. This is a great feature that offers ultimate convenience: You can check on your house anytime, even when you are on the road.
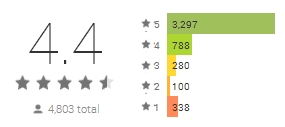
My phone is a Google Nexus 4 running Android 4.3 Jelly Bean. The mobile App I’ve been using to view my Foscam cameras is called IP Cam Viewer Basic, by Robert Chou. It is a free app with ads, but offers tons of features and is very easy to use. There is also a Lite version (only differs from the Basic version in the way it is upgraded – I believe) and a paid Pro version, which enables two-way radio, recording and a few other features. The author also has apps for iPhone and other platforms. At the time of writing, the IP Cam Viewer Basic has a 4.4 rating on the Google Play Store. 
Here are the steps to install and configure the Android app for Foscam cameras:
- On your Android phone, go to Google Play and search for IP Cam Viewer Basic.
- Install the app.
- Open the app and go to Menu, Manage Cameras, and then click on the Add Camera icon (a plus sign).
- Select IP Camera, DVR, NVR. (you can also add other camera types such as a public webcam, for example).
- Enter a nick name for your camera, select Foscam from Make and then select your specific model. The app supports numerous IP cameras so make sure you picked the right one.
- Enter your Host/IP, which is the one you set up with your DDNS account.
- Enter your HTTP Port number.
- Enter your DDNS user name and password.
- These are the basic, necessary settings for your camera. You can go to More Options for image processing, ptz/control, record mode, etc.
- Test your camera and if you see the live video, click Save.
- Return to the Main Menu and click Settings. Here you can change some basic settings for the app, but one thing you definitely want to do is to set an app password. This way every time you open the Cam Viewer app you need to enter the password. A little inconvenience but it prevents unauthorized access to your camera feed. If you phone is lost or stolen, at least you know whoever has it can’t immediately view your cameras. One more thing: After you’re done using the app, click the back button to exit. Next time you will need to re-enter your password. If you just click the Home button the app is still running in the background and no password is required when you open it later. For more details on the app, please go to the author’s support website.
- If you have multiple cameras on the same network, all you have to do is to add each camera with its own name and HTTP Port. DDNS Host information remains the same. From the app you can access all the cameras in a matrix view, or one by one.
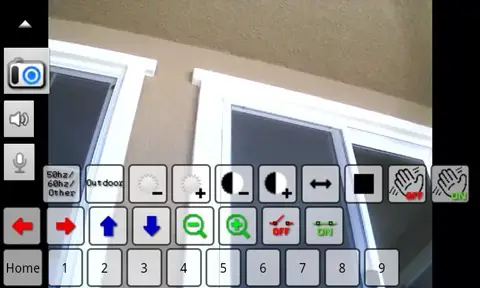
- The app provides full control of your cameras, including pan, tilt, zoom, as well as capturing a snapshot and sending it to an email address.
Obviously there are other mobile apps that may be equally capable or even better, but I’ve only used the IP Cam Viewer so far and really have had no reason to try anything else.
Now to wrap things up:
To install multiple cameras on your home network, you basically follow the same procedure but assign a unique static IP and a unique port number to each additional camera. You only need to maintain one DDNS account to access multiple cameras.
In order to view all cameras at the same time, you have several options: 1. Use a mobile app like the one mentioned above; 2. Select one Foscam camera and add the others in its settings, then use Internet Explorer to access the dedicated camera; and 3. Use a camera management software, such as the Blue Iris Professional Surveillance Software.
Your Foscam camera settings can be saved into a backup file which can be reloaded to restore your parameters.
Home security cameras are convenient and extremely useful, but they do raise privacy concerns for both the home owner and the community. Make sure you understand the laws and regulations with regard to surveillance cameras. If you have the green light to install them, make sure they are set up and configured correctly. And finally, stay safe!
- Section 1: Overview
- Section 2: Basic Configurations
- Section 3: Wireless Connection
- Section 4: Motion Alarm
- Section 5: Remote Access
- Section 6: Access from Smartphone


2 thoughts on “How to Set Up Wireless IP Cameras for Home Security: Access from Smartphone”