
Immigration Road Blog provides the latest news and analyses on all topics related to immigration: Living, working, and studying in the United States.
We discuss green cards, visas, citizenship applications, USCIS regulations, and much more. For each topic, we already have a dedicated section on the main site, so in this blog we’ll take a more casual approach and also expand our coverage.
This is also the place for viewer interactions. You can ask questions in the comments section and we will try to answer them whenever possible. Other readers can also provide input. If you need to reach out to us, please use the Contact Form instead.
Featured Posts
What is “Class of Admission” on Form I-90 or I-131?
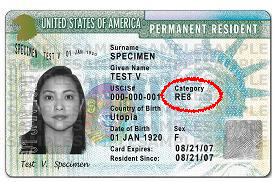
For I-90, question 12 is asking for the class of admission with regard to your permanent residency. It is a three-letter code representing the immigrant category under which you became a permanent resident. If you have a newer version, you can find the code on the front side of your green card right under “Category.”

Do I Need a Visa to Visit Canada?
If you are a U.S. permanent resident, you don’t have to apply for a visa in order to visit Canada. Even if you hold a passport from a country whose citizens are required to present a visa to enter Canada, all you need is your green card, and Electronic Travel Authorization (eTA) if you’re flying to Canada.
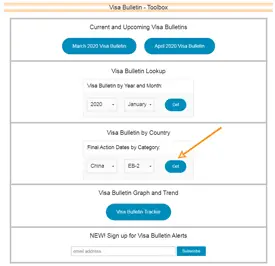
April 2020 Visa Bulletin Analysis and Predictions
India EB2 will move forward by a mere 3 days. And EB3 is not much better, only advancing 7 days. China EB2 and EB3 will move up 17 days and 24 days, respectively. These movements are not even keeping up with the calendar month, so it means retrogression becomes a bit worse.