There are basically two ways to migrate an old PC to a new one: Clone the entire hard drive and copy it to the new PC, or set up the new PC manually and then move old data over. Since my old desktop has too much junk and a 32-bit Vista, I won’t bother cloning its hard disk and will just start fresh with the new laptop.
1. Burn recovery disks
The first thing I did after firing up the laptop was to generate recovery disks. Most PC manufacturers don’t ship the disks anymore, and instead will happily sell them to you. But it is easy to burn the DVD’s on your own. These disks will restore your computer to its factory state after a hard drive crash or corrupted operating system.
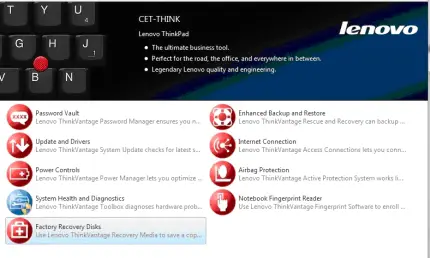
Lenovo’s pre-installed ThinkVantage software has an option to create system recovery disks. The program will instruct you to load blank media and guide you through the process. The first disk is a bootable repair disk, and can be either a CD or DVD. The second and third must be DVD’s to restore your system to factory condition. After installing new operating system and other programs, you can choose to create another set of disks that contain an image of your entire hard drive. This way you don’t have to re-install everything again if you later have to replace the hard drive.
Although I didn’t want to clone my old PC’s hard drive, I still have tons of data I wanted to keep. This is an easy task for me since I regularly back up important files to a NAS (network attached storage). Once my new PC is set up I’ll be able to connect it to the NAS and retrieve them. For now I’ll leave the old PC as is, just in case I forget something. In a few weeks I’ll clean up, format the hard drive and make it ready for disposal or long-term storage.
Another set of information that needs to be retrieved from the old PC is license keys, especially if you’ve lost the installation disks. My Office 2010 was purchased through my employer, using the Microsoft Home Use Program (HUP). Although I still have the setup file, I’ve misplaced the license key. It is almost impossible to retrieve it manually or by contacting Microsoft. Fortunately, there are freeware key finder programs. I tried the Magical Jelly Bean which is highly recommended by bloggers, but it didn’t find Office 2010 (it works with 2003 as I heard). The second software I tried is ProduKey and it worked very well.
3. Download 64-bit Windows 7

As I mentioned before my laptop came pre-installed with 32-bit Windows 7 Professional, and I wanted to switch it to 64-bit. This is free of charge as long as you use the same edition of Windows (Home Premium, Professional, Ultimate). You cannot switch from Home Premium to Pro for free, for example. Also, you won’t be able to “upgrade” a 32-bit operating system to 64-bit, it has to be a fresh install, which is desired anyway.
The problem is that Microsoft doesn’t provide Windows 7 packages for download. I thought about getting the trial versions and then use my product key to activate it, but there are so many restrictions on what can and can’t be done, and Microsoft quickly confused me on this one. So I ended up downloading a Windows 7 ISO image from Digital River (just Google it). This is not a free or counterfeit copy of Windows – you must have a legally purchased product key in order to use it – but it saves a lot of hassle. Digital River is a legitimate distributor of Microsoft products and their downloads are genuine and official Windows packages. Just make sure you pick the right version since there are a lot of choose from. Mine is X17-59186.iso, which is the Windows 7 Professional with SP1 x64 English. The download is 3GB, so make sure you have enough space.
The factory recovery disks created in step 1 don’t provide an option to install 64-bit instead, which would have been convenient.
Another option I considered was to keep the 32-bit Windows 7 for now, and upgrade it to Windows 8 for $14.99 when it is available. But I didn’t want to re-install my applications all over again or rush to an unproven operating system. So I’ll be staying with Win 7 Pro for a long time.
4. Burn a bootable Windows installation disk
In order to use the Windows ISO image to do a fresh install, you must burn a bootable DVD first. Luckily, Microsoft has a free utility just for this purpose: Windows 7 USB/DVD Tool. Once you install and start the tool, you may copy your Windows 7 ISO image to either a USB flash drive or burn it onto a DVD. In my case I tried USB first, but it failed twice (copying was OK, but couldn’t make it bootable). In the end I chose the DVD option and it went smoothly.
 This is a good time to make sure you have the OEM product key for Windows. For a new laptop, it is usually printed on a sticker which is attached to the back panel, or behind the battery. It contains your OS’ license key that must be used to activate Windows 7. The sticker looks something like this:


1 thought on “Set Up a New PC Part I: Get Started”